Here we will look at how to set up your WHMCS to run scheduled cron jobs through your cPanel. This allows you to let your clients automatically have their websites and hosting, etc. set up without actually manually doing it. It is an automation feature, which coming from your system’s cPanel, is availabile in WHMCS. Basically in cPanel you create a new job under Cron Jobs and set it to your cron.php in WHMCS to run the automation. These scheduled tasks are very useful for several web applications for businesses or even personal use.
So firstly, we need to create a new server in the Servers menu and a product in our Products and Services menu in WHMCS.
Assuming you have your WHMCS installed, go to the admin directory “whmcs/admin/” and login.
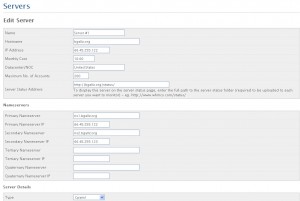
Under Setup go to Servers (if you don’t have a server already made) click Add New Server. You generally have one main server for the WHMCS you are using, but some larger companies and business/groups have multiple servers – VPS, Dedicated, etc. Here you need to fill in the information for your server. Below is an image of what mine looks like:
Depending on the software you are using you will need to select it in “Type” and input your connection username and password. You will then need to create at least one group for the server you just made. These groups are the different types of accounts that will be setup to run off of this server you select.
Then, under Setup go to Products/Services. If you don’t have any groups or products, click the add group/new product links to create a new group and a product inside that group. Set up whatever specific details you want for your new product. If it is hosting of some kind, or just a purchasable service, fill it out to its entirety.
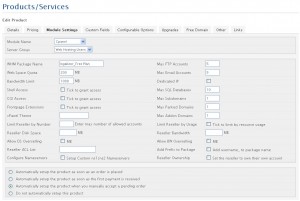
Under the Module Settings tab, you will find the fields and inputs for setting up the cPanel and Cron Job properties. Below is an image of what my Product Module Settings looks like:
I use cPanel so that is my Module Name. Then you just select the server group you just made for your server.
Web Host Manager Settings
In your cPanel at the very bottom of the index (homepage) there is a link for your Web Host Manager (WHM). This is the software that cPanel uses for maintaining all of the hosting accounts you have on your server. You must set up your nameservers here that are used in the server you setup in WHMCS. You do this by clicking the “Basic cPanel & WHM Setup” link. You must also add the packages here that are the same titles you used when setting up the products and services in the Module Settings tab under “WHM Package Name.” Your WHMCS will run Cron jobs based off of these values so make sure they are correct.
Finally, we must set the Cron Jobs Settings in cPanel.
On your cPanel index page, towards the bottom there is a link for Cron Jobs.
- Enter an email address for support on these accounts affected.
- Enter the time interval for this Cron Job to be ran.
- The Command is the address to your cron.php file in WHMCS.
My command line is something like so:
[code lang=”html”]php -q /home/mysite/public_html/whmcs/admin/cron.php[/code]
This tells cPanel where to get the cron.php script from so it can run the automated jobs for your WHMCS services. Be sure to go through all the settings for the Product/Service you setup. There are a lot of features you may want on or off depending on what the service is.
And that’s it! Enjoy setting up endless hosting accounts, hands free!

